The Audacity sound editing program, available as freeware on Windows, Linux and Mac OSX, has a built-in function that turns high-fidelity 16- and 32-bit sound files into low-fi 8-bit recordings.
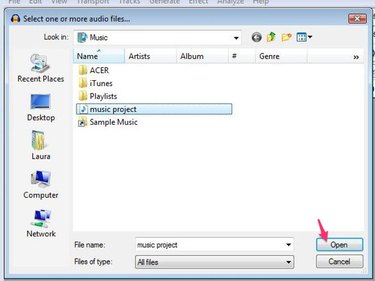
Step 1: Open A File
Click the File menu. Select an audio file to work on, then click the Open button to open the file.
Video of the Day
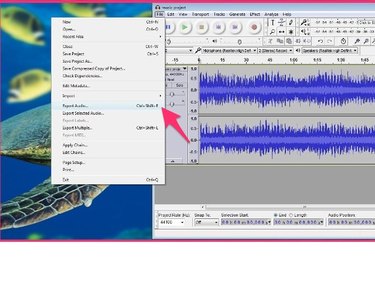
Step 2: Export Audio From File Menu
Click the File menu, then select Export Audio.
Audacity opens a file dialog box.
Step 3: Enter File Name
Type a name for your 8-bit audio file in the File name field.
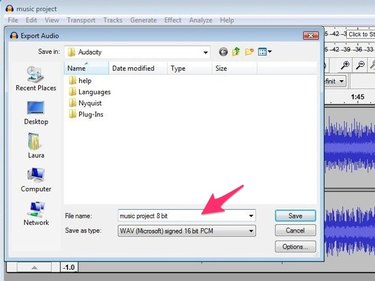
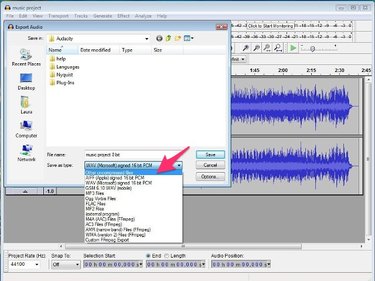
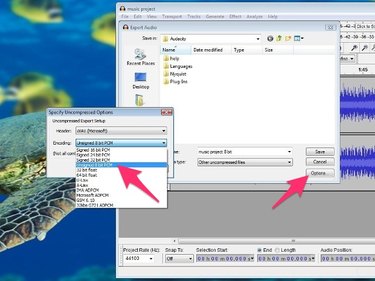
Step 4: Select File Type
Click the Save as type pull-down list and select Other uncompressed files.
Step 5: Options Button
Click the Options button and select Unsigned 8-bit PCM from the list that appears. Click the Save button. Audacity displays a dialog box containing metadata information for the file.
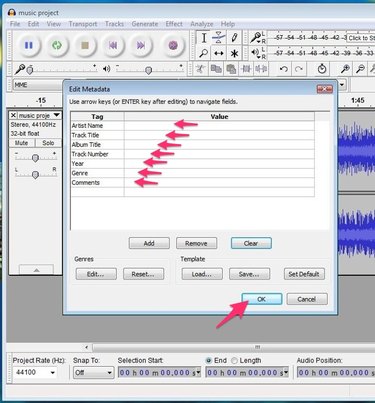
Step 6: Set Metadata
Edit the file metadata, including Artist Name, Genre and Year. You can modify this information or leave it blank. Click the OK button. Audacity saves your file in the 8-bit format.
Video of the Day