


From the Artist: How to Make a Real Mobile
It’s all in the balancing points: A top mobile designer shows how to create a Calder-inspired installation of your own
Marco Mahler
December 8, 2014
Ever since I came across Alexander Calder‘s mobiles at the National Gallery of Art twenty four years ago, I’ve been fascinated with mobiles. At first I tried my hand at minimalistic wire mobiles. After receiving requests for larger custom mobiles, what started as a hobby turned into a full-time occupation.
In chronological order: my work has been featured at New York Fashion Week in Bryant Park. I’ve contributed articles about mobiles to several publications such as Make Magazine, Saatchi Art and Houzz. The 3D printed mobiles, created in a collaboration with Henry Segerman, have been featured in Gestalten’s “Printing Things – Visions and Essentials for 3D Printing” and at the 2015 3D Print Shows in California, Paris and Dubai. A series of three large custom mobiles I designed and made won...
Ever since I came across Alexander Calder‘s mobiles at the National Gallery of Art... More
I’d like to explain how to make a real mobile. By a “real” mobile, I mean one in which the balance of the different parts depends on those parts, which results in much more interesting dynamics than if you just tie a number of objects to a coat hanger or a horizontal circle.
There are a number of articles on how to make mobiles with specific materials, but none of the ones that I’ve come across explain how the balance structure of a real mobile works. I’d like to provide you with a sort of blueprint for mobiles. Once you have that, you will see how to make a mobile using any materials, whether those are just some random objects you find around your house, objects specific to a season or a holiday, or some midcentury modern shapes.
There are a number of articles on how to make mobiles with specific materials, but none of the ones that I’ve come across explain how the balance structure of a real mobile works. I’d like to provide you with a sort of blueprint for mobiles. Once you have that, you will see how to make a mobile using any materials, whether those are just some random objects you find around your house, objects specific to a season or a holiday, or some midcentury modern shapes.

Here is a large custom mobile I made out of carbon cold-rolled steel and metal rods, influenced by American sculptor Alexander Calder’s groundbreaking mobile designs. He used the same principles in his piece “Snow Flurry” (1940).
With this type of mobile, the balance of the upper parts depends on the weight of the lower parts. Therefore, all mobiles of this type are built from the bottom up, meaning you start with the lowest part of the mobile first.
More about the history of mobiles as art
With this type of mobile, the balance of the upper parts depends on the weight of the lower parts. Therefore, all mobiles of this type are built from the bottom up, meaning you start with the lowest part of the mobile first.
More about the history of mobiles as art

How to Make a Mobile
Materials and tools:
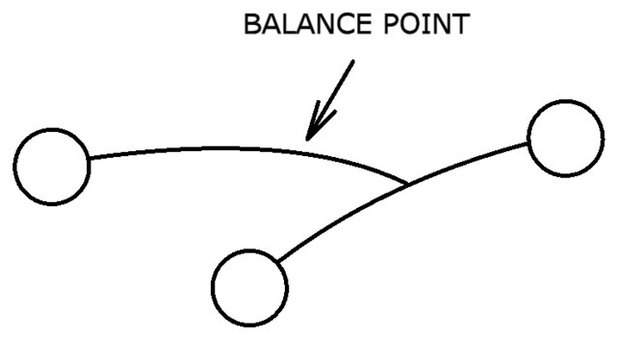
1. Take two objects and connect them with an arm (a piece of wire, a stick or whatever you choose). Find the balance point on that arm. You can find it by simply holding the arm between your finger and thumb and adjusting their position as needed. If you’d like to be more exact, tie a string to the arm and move the string to the left and right until it strikes the balance you’re after.
Steel wire works well for the arms. Most hardware stores sell it in rolls of 100 feet for less than $10 per roll. If you’re making a small mobile with light attachments, you should be fine with an 18-gauge roll. If you’ll be making your mobile a little bigger, use 16- or 14-gauge wire (the smaller the gauge number, the thicker the wire).
Materials and tools:
- Steel wire (18-, 16- or 14-gauge)
- Fishing line or swivels (optional)
- Material for shaped pieces (poster board, plastic sheeting, aluminum flashing, sheet metal etc.)
- Scissors and tin snips
- Needle-nose pliers
- Drill (3/64 drill bit to make holes for 18-gauge wire, 1/16 for 16-gauge wire, 5/64 for 14-gauge wire)
1. Take two objects and connect them with an arm (a piece of wire, a stick or whatever you choose). Find the balance point on that arm. You can find it by simply holding the arm between your finger and thumb and adjusting their position as needed. If you’d like to be more exact, tie a string to the arm and move the string to the left and right until it strikes the balance you’re after.
Steel wire works well for the arms. Most hardware stores sell it in rolls of 100 feet for less than $10 per roll. If you’re making a small mobile with light attachments, you should be fine with an 18-gauge roll. If you’ll be making your mobile a little bigger, use 16- or 14-gauge wire (the smaller the gauge number, the thicker the wire).
2. Attach a second arm with one object at the end to the balance point you just found on the first part. See how next.
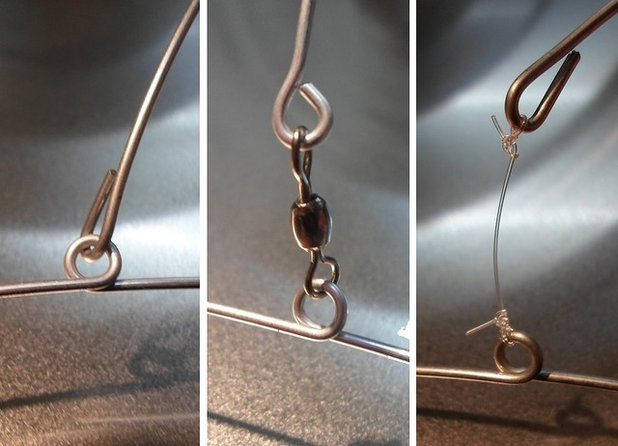
Joining arms: If you’re using wire for the arms, there are a few ways to connect them. You can just loop them into each other (left), or you can connect them with strings (right) or swivels (center) if you’d like the separate parts to be able to rotate. Regular fishing line or fishing swivels will do, and you can get them at any outdoor-sports store.
I make the loops by wrapping the wire around a pair of needle-nose pliers. A round-nosed pair works best (more often available at craft stores than at hardware stores), but you can make good loops with a pair of the more common flat-nosed pliers too.
I make the loops by wrapping the wire around a pair of needle-nose pliers. A round-nosed pair works best (more often available at craft stores than at hardware stores), but you can make good loops with a pair of the more common flat-nosed pliers too.
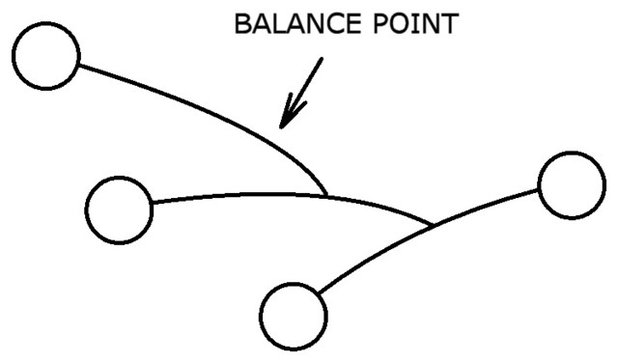
3. Find the balance point on the arm of that second part using the methods described before. Make the third part with one object and one arm and connect it to the balance point on the second part.
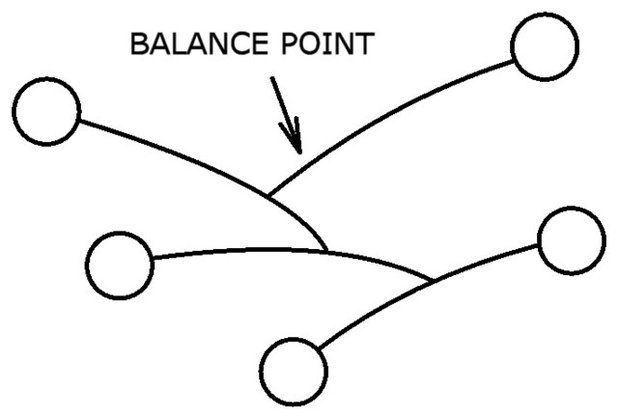
4. Keep going up this way, making more parts and connecting them to the balance point below. You can attach them so they all point in the same direction, alternate them left and right, or arrange them in a random pattern. Do whatever you think looks good.
Tip: I put the mobile on a hook hanging from the ceiling as I work on it. I make a new part for the mobile, then I take the mobile down from the hook, attach the new part to the mobile, then put the mobile back on the hook. And so on.
Tip: I put the mobile on a hook hanging from the ceiling as I work on it. I make a new part for the mobile, then I take the mobile down from the hook, attach the new part to the mobile, then put the mobile back on the hook. And so on.
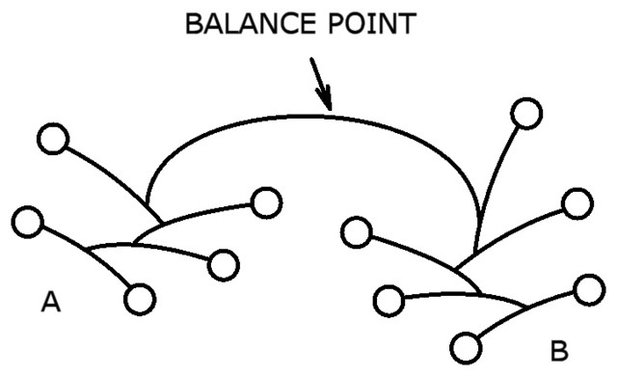
5. Now let’s look at a variation similar to Calder’s “Snow Flurry.” It’s based on basically the same principle that we’ve been using. You make two separate assemblages, labeled A and B here. Then you connect the two at each of their balance points and find the new balance point on that connecting arm.

You can keep going up from there.
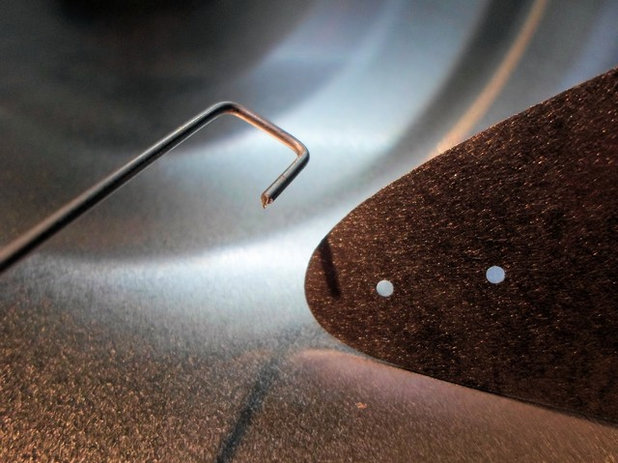
Attaching objects to arms: If you’re attaching flat shaped pieces to the end of the arms (whether they’re made of poster board, plastic sheeting, aluminum flashing, sheet metal etc.), one way to attach them is by making two holes in the piece. Then bend the end of a piece of wire into a rectangular hook that fits the distance of the two holes.
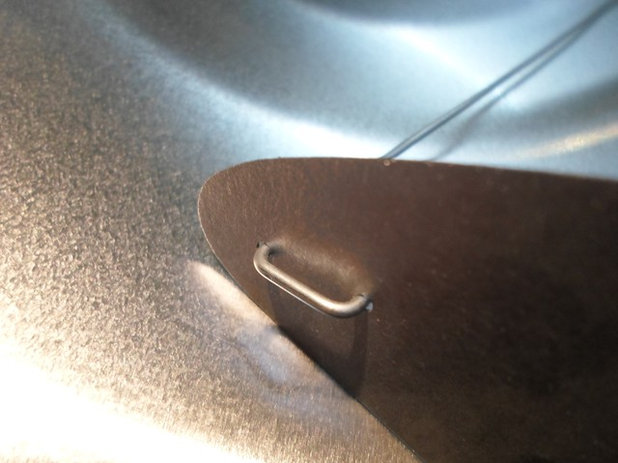
Loop the hook into the holes.
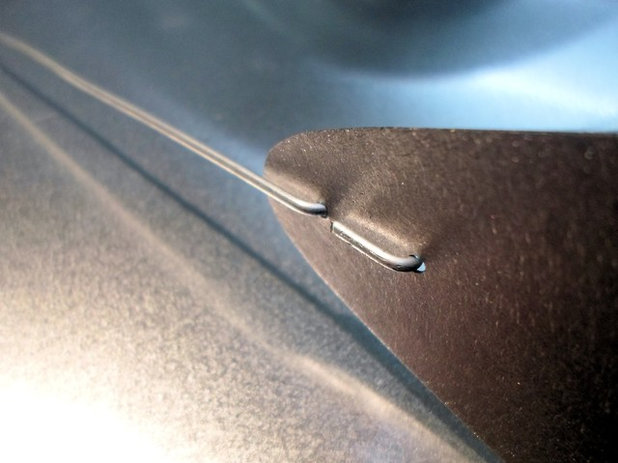
Then bend the wire flat to the piece as shown.
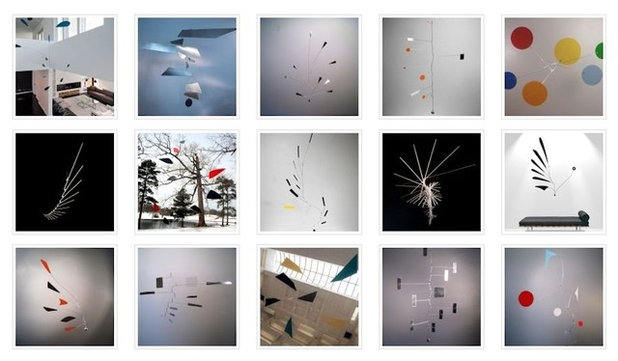
Now you have a basic understanding of how to make a mobile. Time to experiment and have fun. Look at other mobile designs and get inspired. I made all of the mobiles in this composite photo, and they are all based on the same balance structure discussed here. The possibilities are infinite.
More: Learn about the history of mobiles as art
Tell us: Have you dabbled in mobile making? Please post a photo of your project in the Comments below.
More: Learn about the history of mobiles as art
Tell us: Have you dabbled in mobile making? Please post a photo of your project in the Comments below.


We care about your home remodeling project needs as much as you do. We believe in conducting business with... Read More
What are you working on?
Related Products

Dream Baths is a complete design-build-remodel firm located in the Historical German Village area of downtown... Read More
Related Stories
Houzz Tours
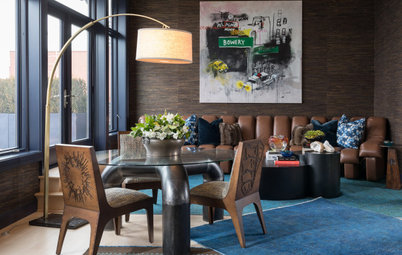
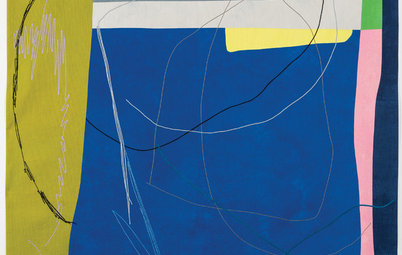
Swanky Penthouse Features Vibrant Works by Famed Street Artists
A blue color palette, vintage furniture and a top-notch art collection are among the highlights of this Arkansas home
Full Story
Houzz TV Favorites
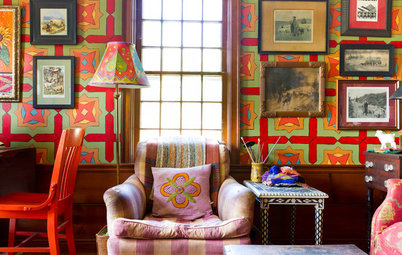
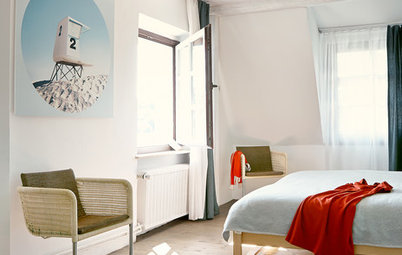
Houzz TV: A New England Farmhouse Explodes With Color
By Rikki Snyder
Creativity and color burst from every corner in this unique 18th-century Massachusetts home for an artist and her family
Full Story
Art
6 Bold Murals Turn Outdoor Walls Into Art
When sprucing up your outdoor space, consider adding something one of a kind to the walls too
Full Story
Wall Treatments
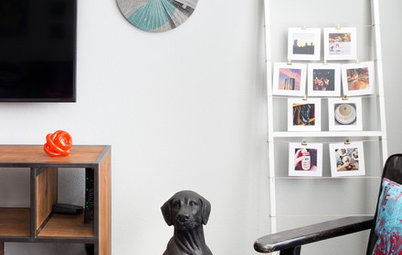
How to Display Lots of Photos Without a Perfect Gallery Wall
You can skip the matching frames and careful arrangement and hang your photos using one or more of these fun ideas
Full Story
Decorating Guides
A Beginner’s Guide to Original Art and Limited-Edition Prints
Get the basics on investing in art for your home
Full Story
Events
See the Cream of the Crop From Quilt National ’17
The judges of the international art quilt competition reveal their 12 favorites — and why
Full Story
Decorating Guides
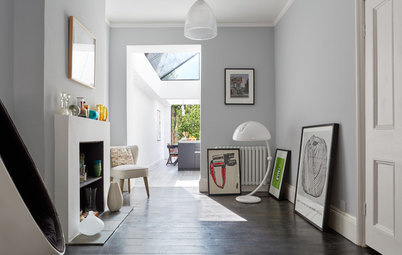
8 Reasons to Update Your Space With a Big Picture
Instead of a gallery of small pictures, consider a large-scale photograph for your wall
Full Story

World of Design
Modern Mosaic: Anne Dérian’s Art Emerges Piece by Piece
See how a French architect in Berlin creates stunning ceramic installations for the home
Full Story

Art
Houzz Call: Show Us Your Outdoor Art
By Erin Carlyle
Do you have a piece of original art displayed outside your home? We want to see it!
Full Story
Landscape Design
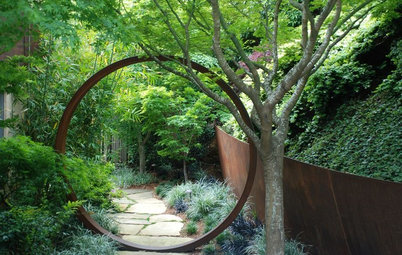
Elevate the Garden With Understated Art Pieces
These 10 simple, thoughtful objects bring beauty and a sense of place to the landscape
Full Story
Thanks, Craabe! Happy you found this useful. All the best with your
mobile made with glass pieces! Let me know if you have questions that I
may be able to answer as you go.
I have been making mobiles and stabiles for years as art therapy make about 10 piesces a year
@William, they look great!